Acer Chromebook 314
This guide is for the Acer Chromebook 314. It will contain tutorials and references to tools for installing Linux on the device. The specific model that I’m using is the Acer Chromebook 314-1H-C3M8. There might be some differences between this model and other models of the Acer Chromebook 314, so be aware of that.
Enabling Developer Mode
This is necessary to install Linux on the device. Be aware that this will wipe all local data on the Chromebook, so make sure to back up anything important before proceeding. Also, it doesn’t have fully support UEFI, and will show a warning screen every time you boot up the Chromebook. To skip this warning screen, just press Ctrl + D.
To enable Developer Mode, follow these steps:
- Turn off the Chromebook.
- Press and hold the
EscandRefreshkeys together, then press thePowerbutton. - When the Chromebook starts up, there should be a recovery screen. Press
Ctrl + Dto enable Developer Mode. - Then you have to confirm this using
ENTER. The Chromebook will reboot and enable Developer Mode. This will wipe all local data, so make sure to back up anything important. - The Chromebook will reboot into Developer Mode. You’ll see a warning screen every time you boot up the Chromebook. To skip this warning screen, just press
Ctrl + D. - Set up the Chromebook as you would normally.
Boot from USB
For this, you have to have the developer mode enabled
First you have to enable USB booting. To do this, follow these steps:
- Press the keys
Ctrl + Alt + F2 (right-pointing arrow)to open a terminal. - Type in
shelland pressENTER. - Type in
sudo crossystem dev_boot_usb=1 dev_boot_legacy=1and pressENTER. - You can now go back to the Chrome OS by pressing
Ctrl + Alt + F1 (left-pointing arrow).
Now you can boot from USB. To do this, follow these steps:
- Reboot your Chromebook.
- When the warning screen appears, press
Ctrl + Uto boot from USB. (pressCtrl + Lfor legacy boot) - You can now boot from USB.
Disable BIOS Write Protection
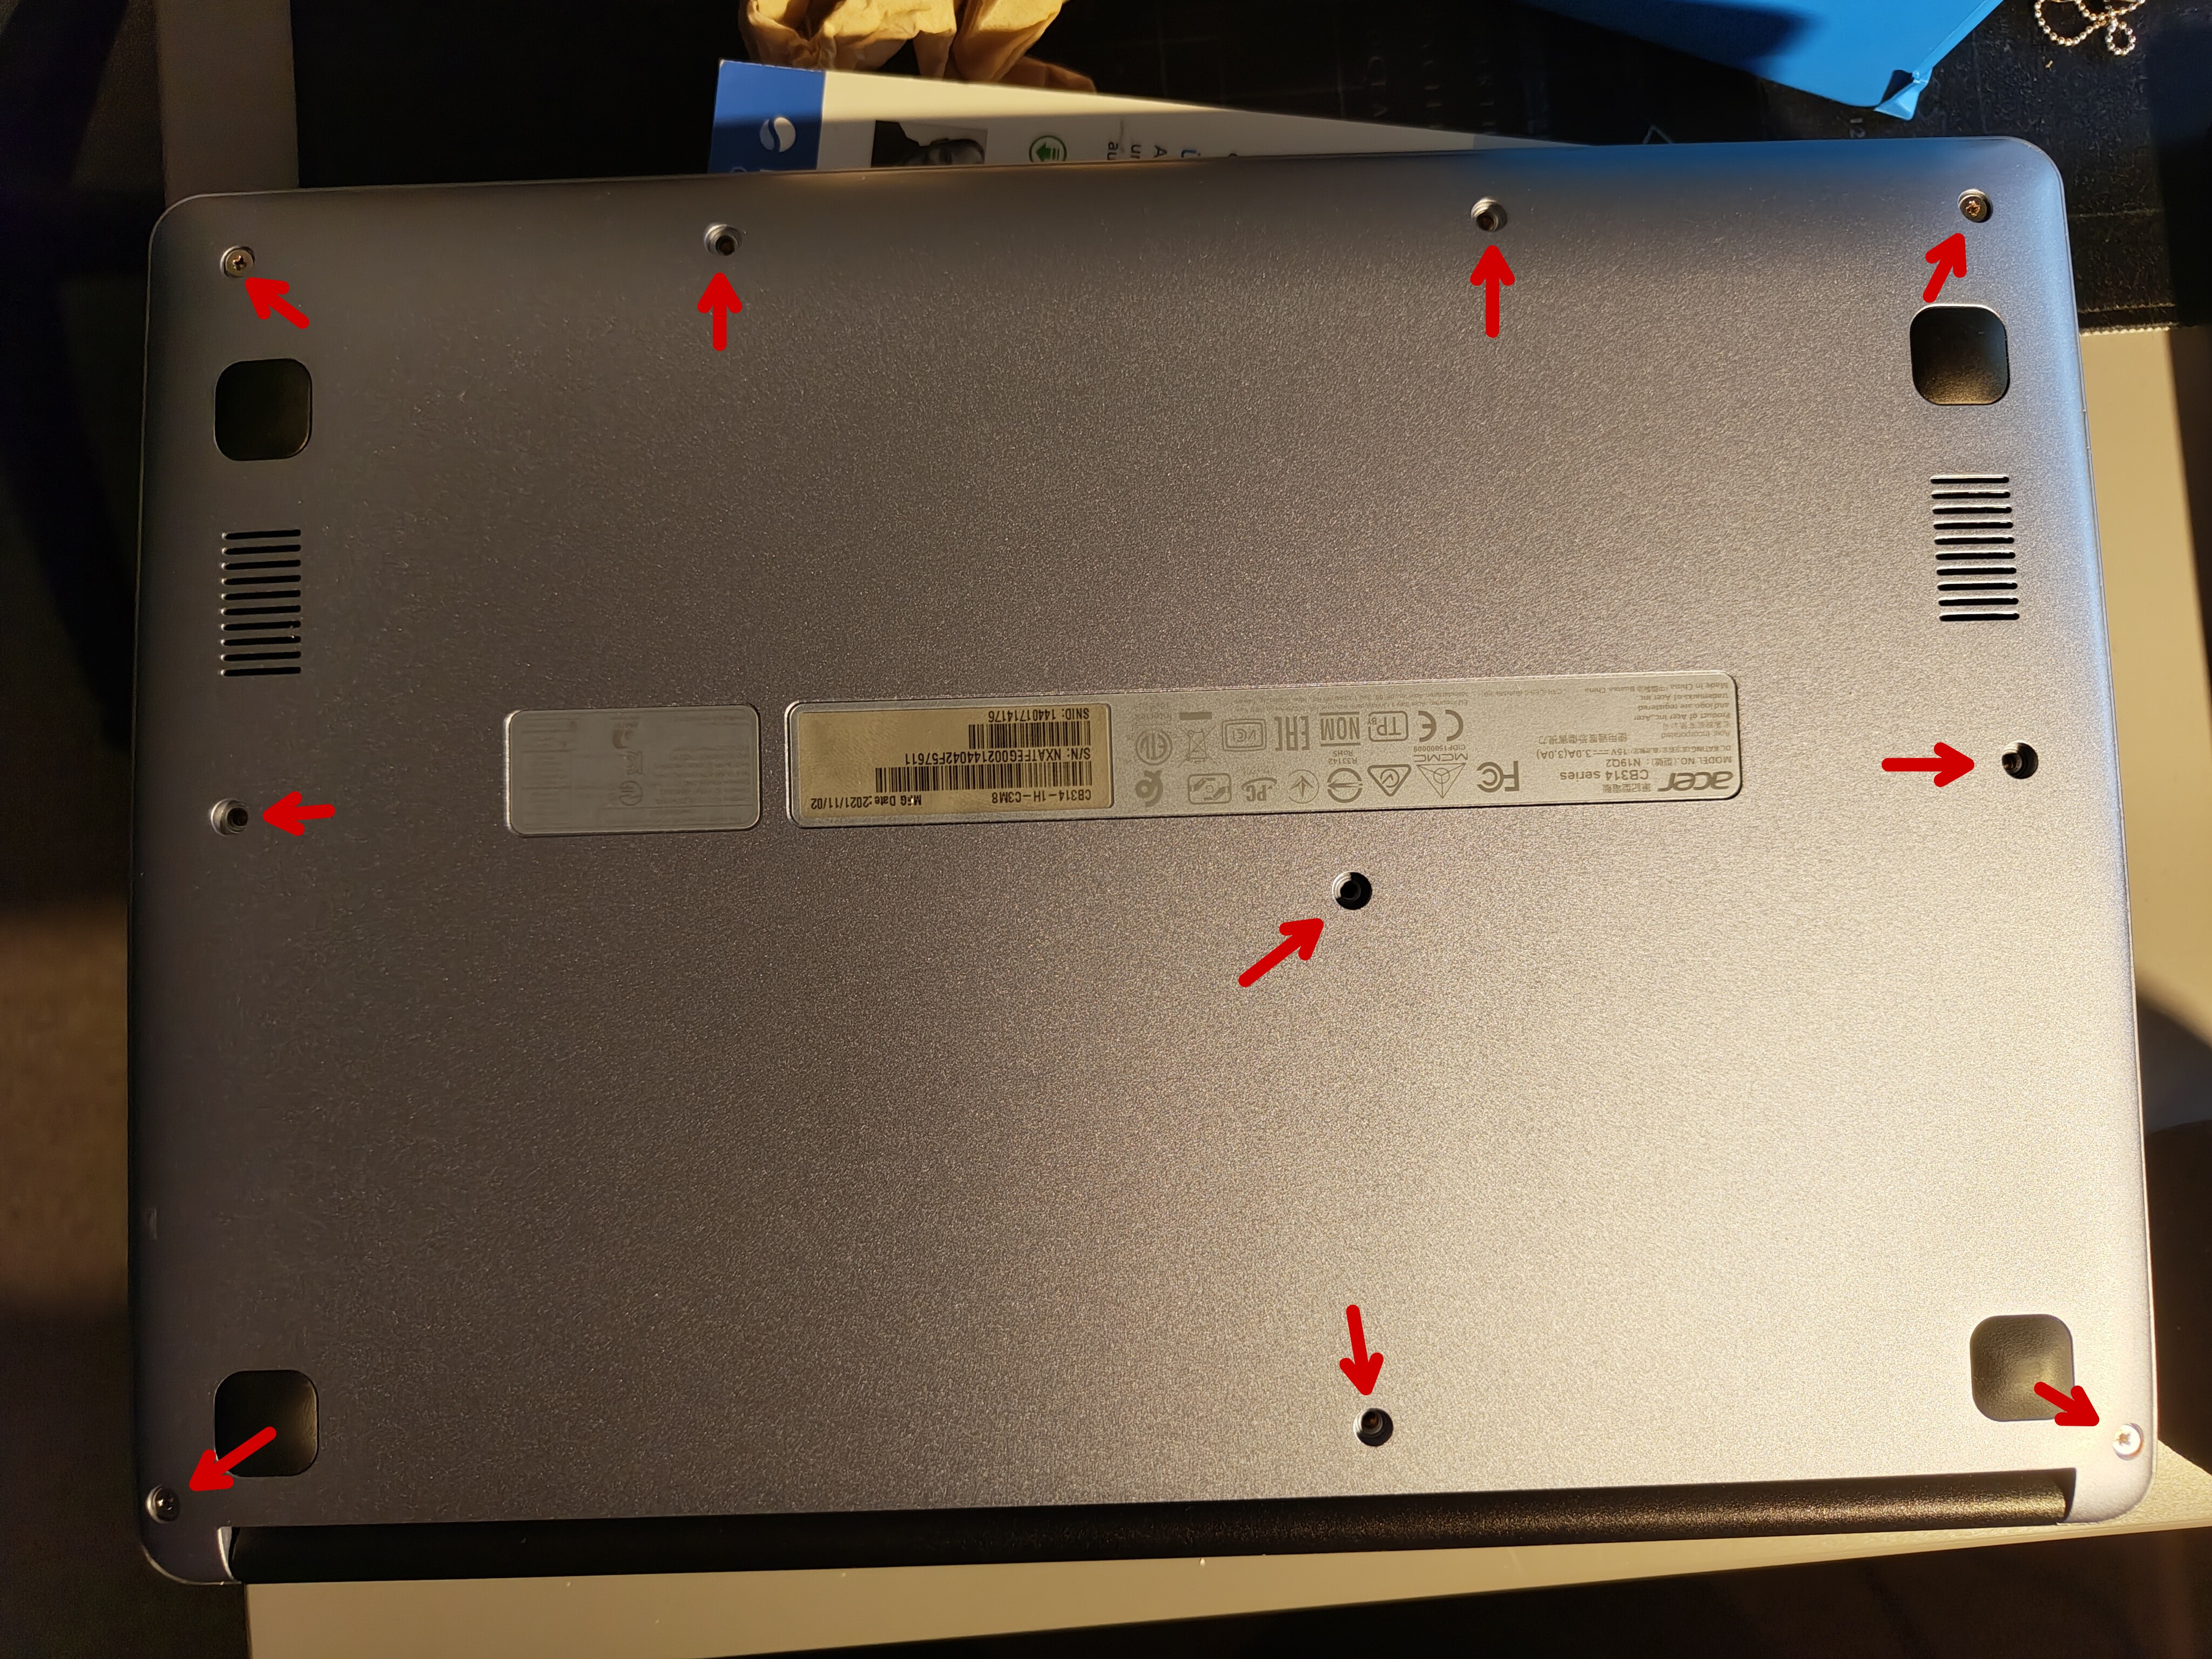
For this, the developer mode has to be enabled. This is only needed if you want to flash a custom firmware. You’ll need a screwdriver to open the Chromebook. If you have a IFixit kit, you can use the PH0 head, and the slotted 2 or a plastic opening tool for opening the clips inside.
- Turn off the Chromebook.
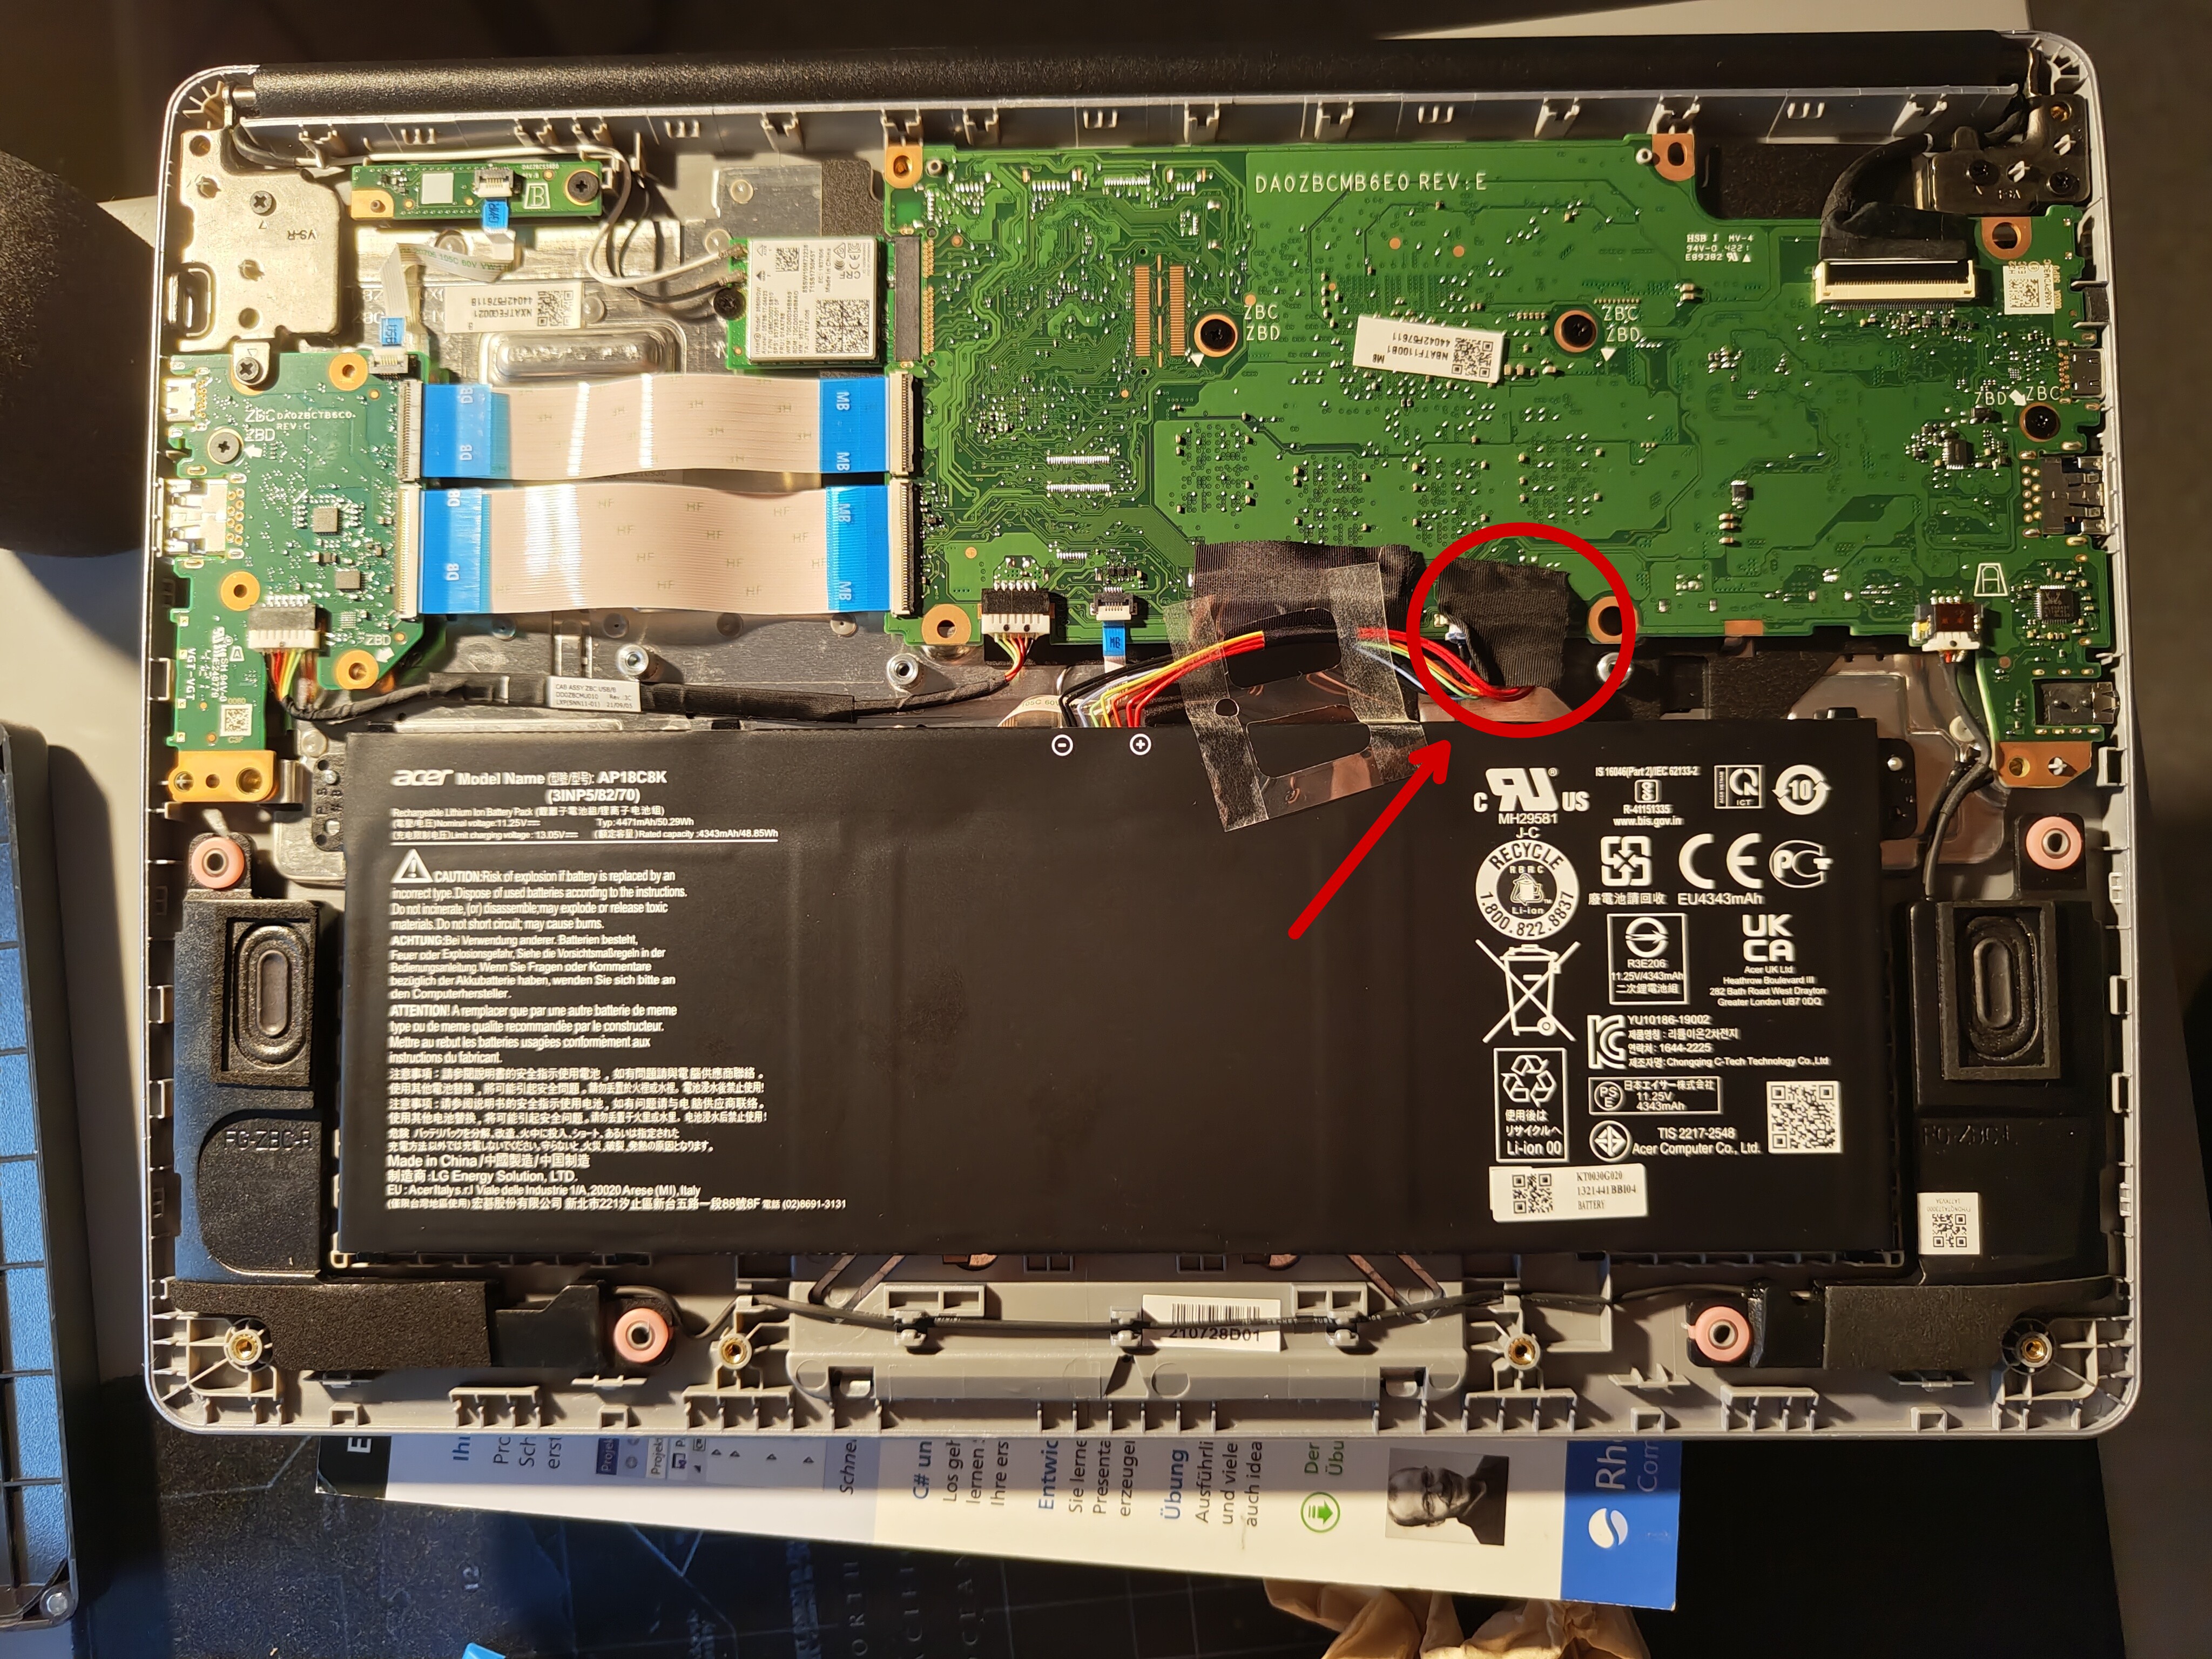
- Open the Chromebook by removing the screws on the bottom. And then carefully open the clips inside.
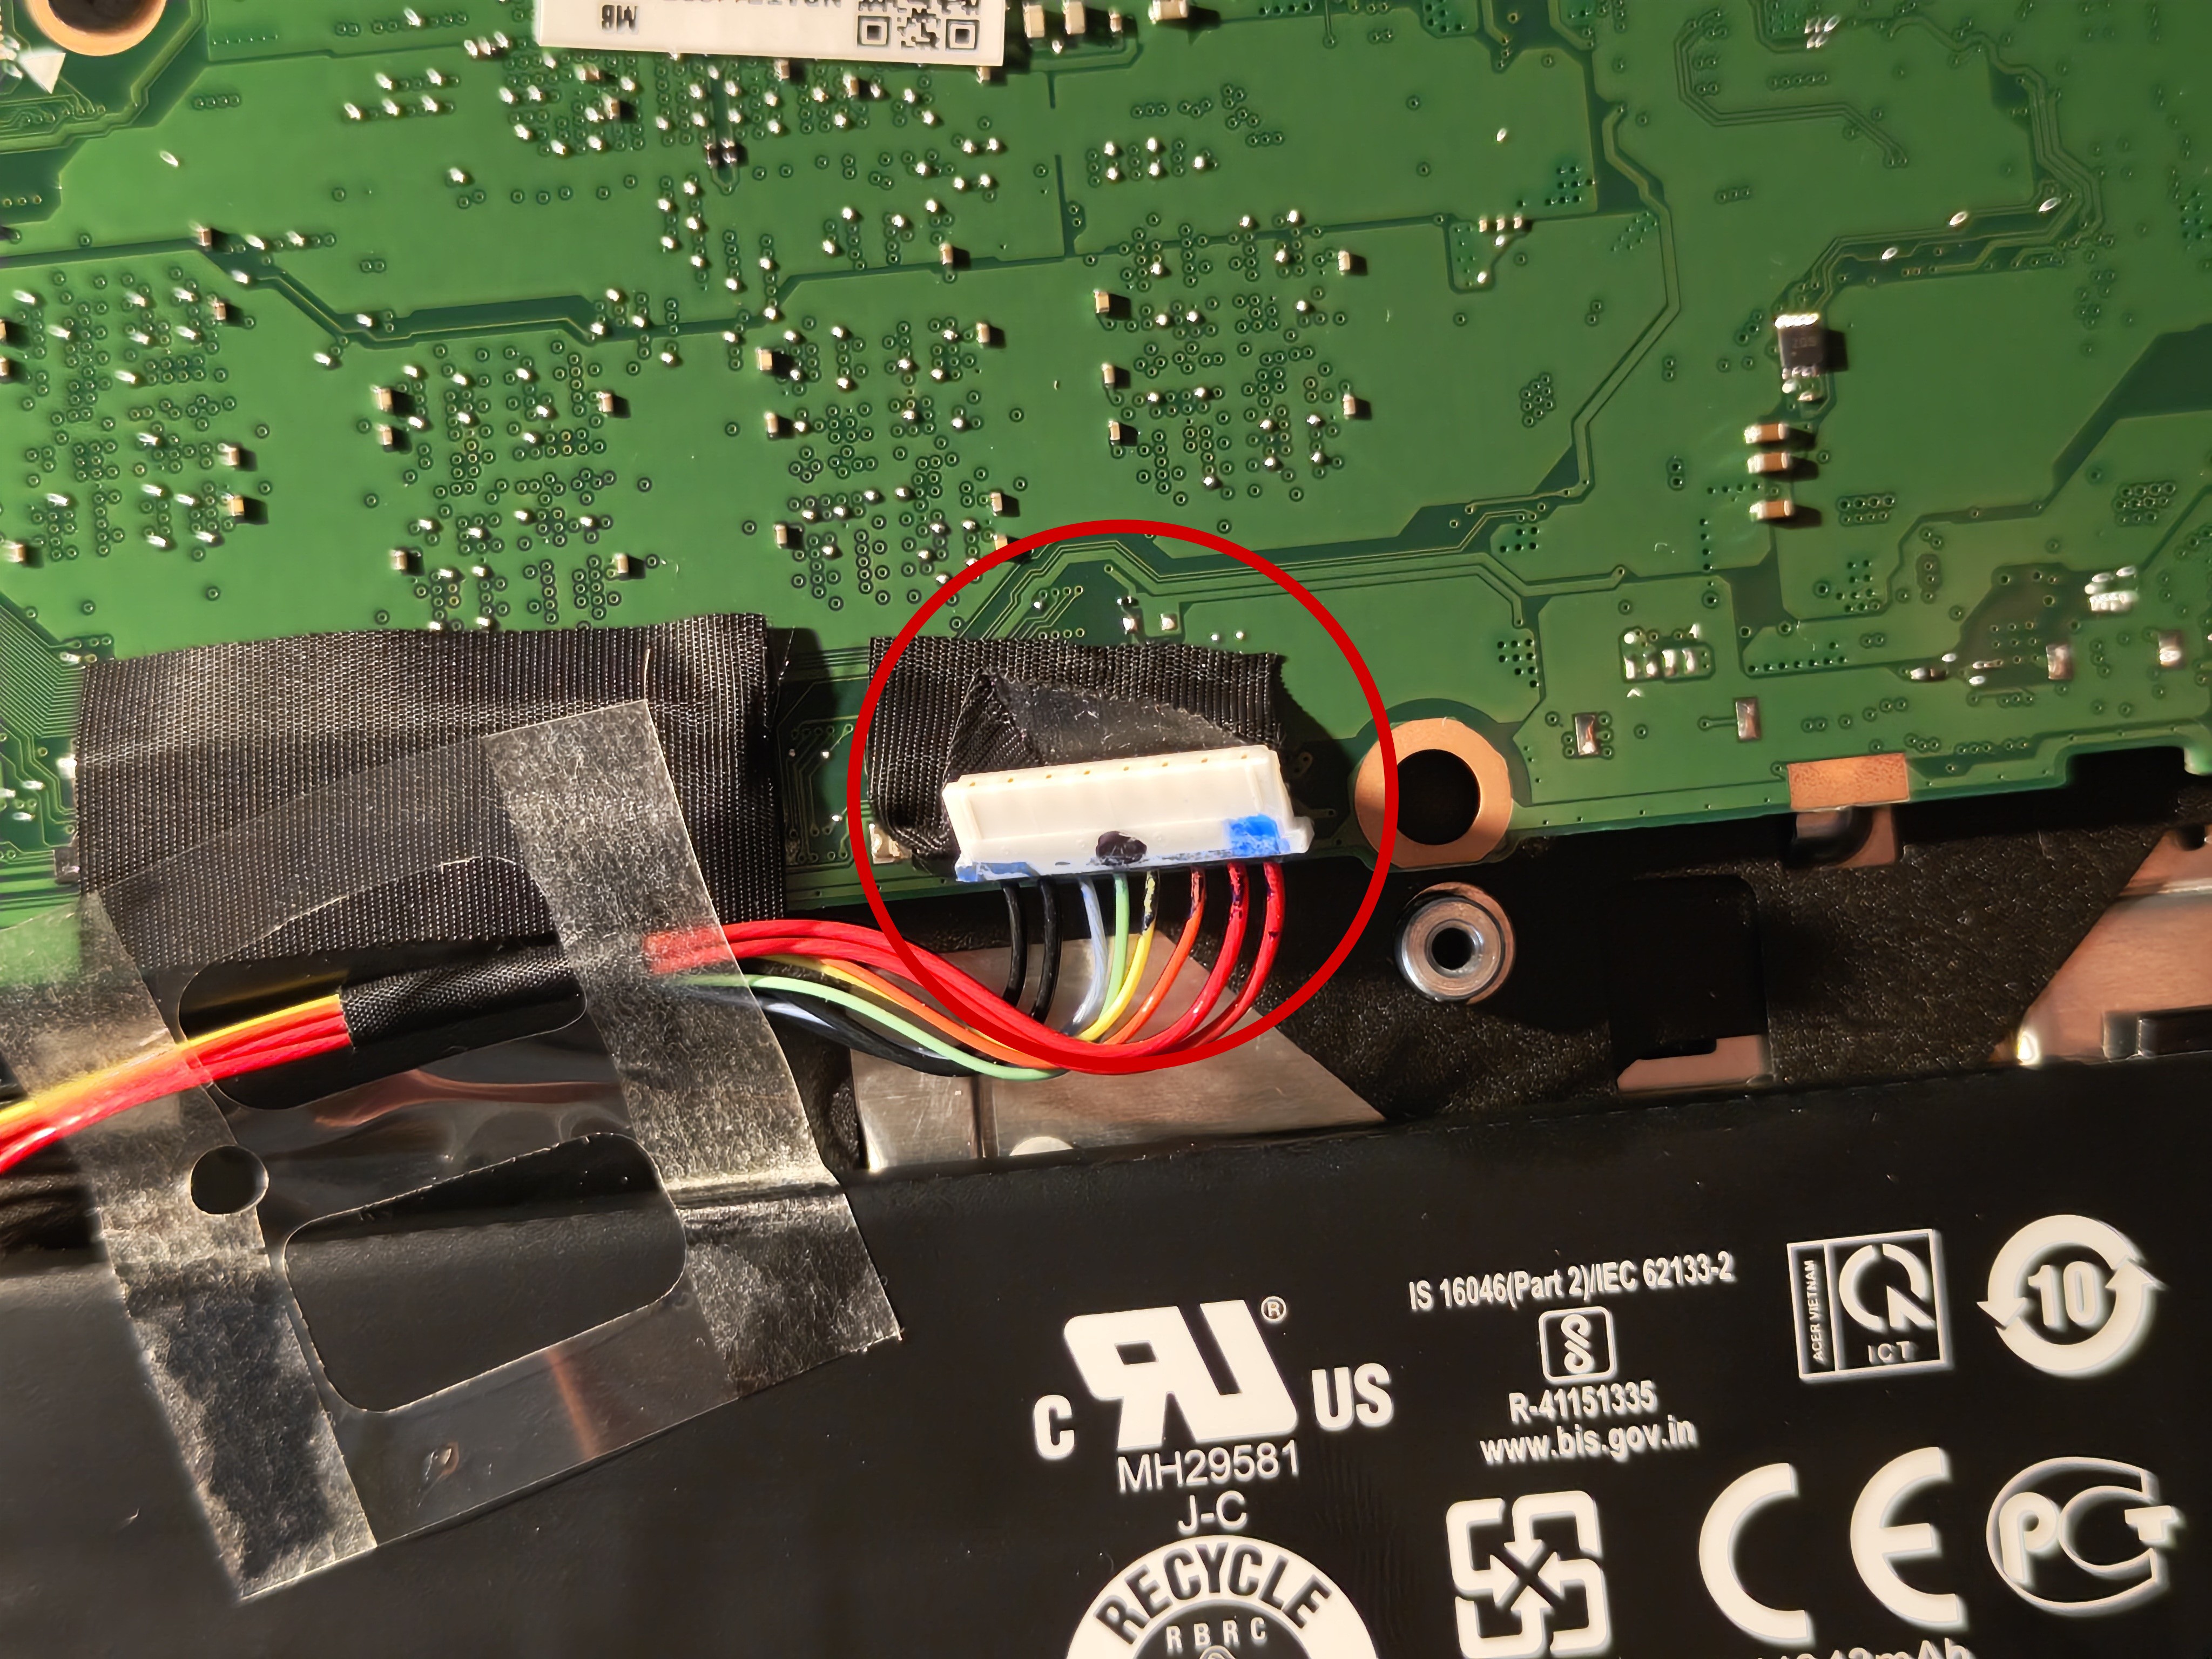
- Disconnect the battery from the motherboard.
- Now boot up the Chromebook with the battery disconnected. Now the write protection should be disabled.
If it didn’t work, you can see more methods on MrChromebox.tech.
Full ROM UEFI Firmware (by MrChromebox)
After the flash, you can not boot ChromeOS anymore
Before you start, please make sure that your device is supported. For this, go to MrChromebox.tech and check if your device is supported.
Also, make sure that the write protection is disabled. If you haven’t done this yet, follow the steps in the previous section.
- Open your terminal with
Ctrl + Alt + F2 (right-pointing arrow)orCtrl + Alt + T. - Then you have to type in
shelland pressENTER. - Now you have to download the script. Type in
cd; sudo bash <(curl -s https://mrchromebox.tech/firmware-util.sh)and pressENTER. - Select the second option,
Install/Update UEFI Firmware. - (optional, but recommended) Confirm to backup the stock firmware, and follow the instructions displayed.
- After the flash is done and no errors or following instructions occurred, you can reboot your Chromebook.
- Install your desired OS. This step is needed because you can not boot ChromeOS anymore.